
")
")
")
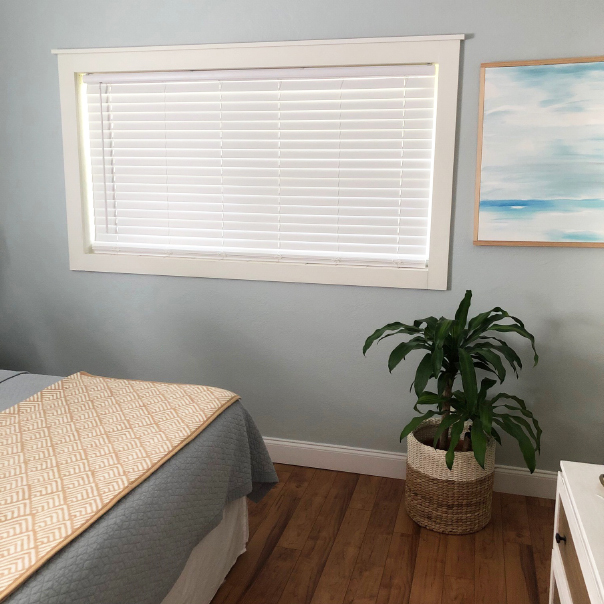
EASY WINDOW TRIM HACK
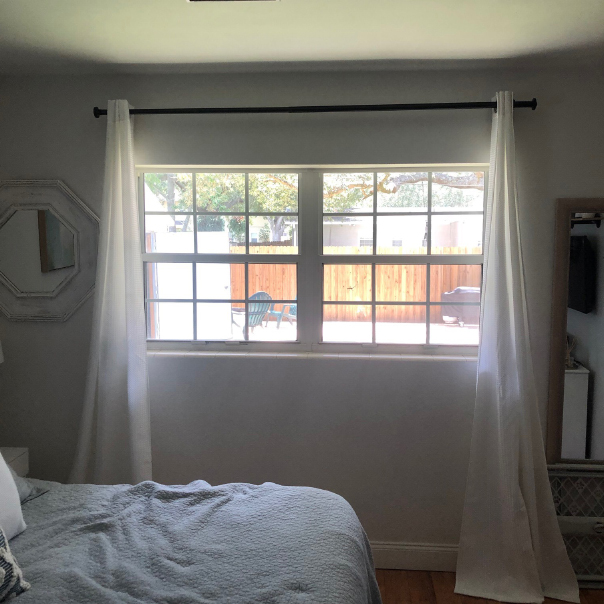
Our little “fixer upper” had zero window appeal so we took matter into our own hands and added some personality to our window trim that was otherwise non-existent.
Y’ALL. What a change, it feels like another room, modernized and so much better. If you have flat boring walls around your window with zero trim this hack is so affordable and can be done in one day!
Here’s how we did it, another tip…I painted our walls after creating the trim with a light baby blue so that the trim could pop more! But leaving it as is, works too!
WHAT YOU WILL NEED:
Wood ( the amount of wood depends on your measurements)
Smaller trim of wood ( you will see the kind we bought below for the top accent portion )
Brad nailer ( nail gun )
Tape Measure
Paint Brush
White Paint ( I used a bright white by Behr, flat )
Caulk
Tape Measure
Electric Saw or have home depot cut it down to your measurements
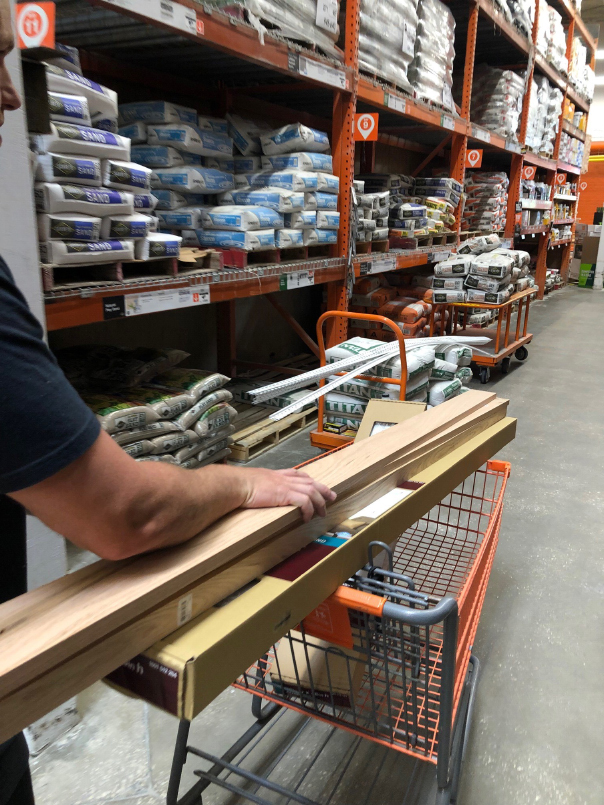
PURCHASE TOOLS & WOOD
We took a trip to Home Depot to pick up our wood planks. We were going to cut them down ourselves at home so we made sure that we just had long enough planks. I picked up all my tools above that I needed and also the white paint I was going to paint the trim with. I chose a brighter white because it went more with my bedroom look but you can choose whatever shade works for you.
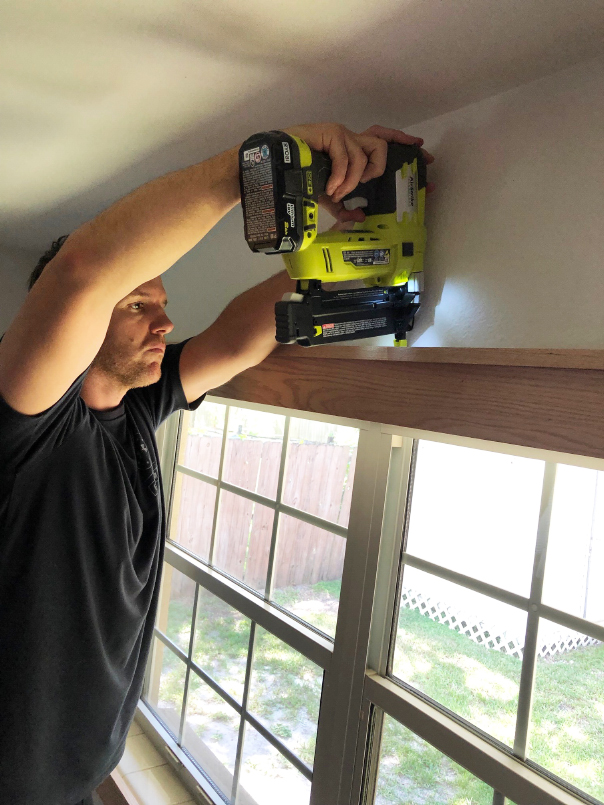
PLACING THE PLANKS
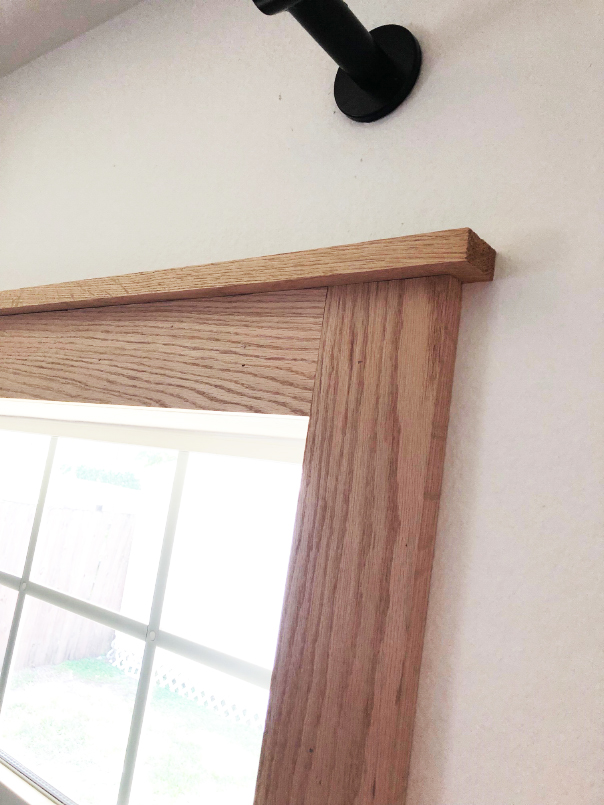
First, we started nailing the top piece and then one of the side panels, and worked our way again to the side and down. We had to use our measure tape a few times to make sure everything was aligned perfectly so take your time before you actually nail these suckers in! We shot the trim accent piece on top as well, shooting the nail gun downward.
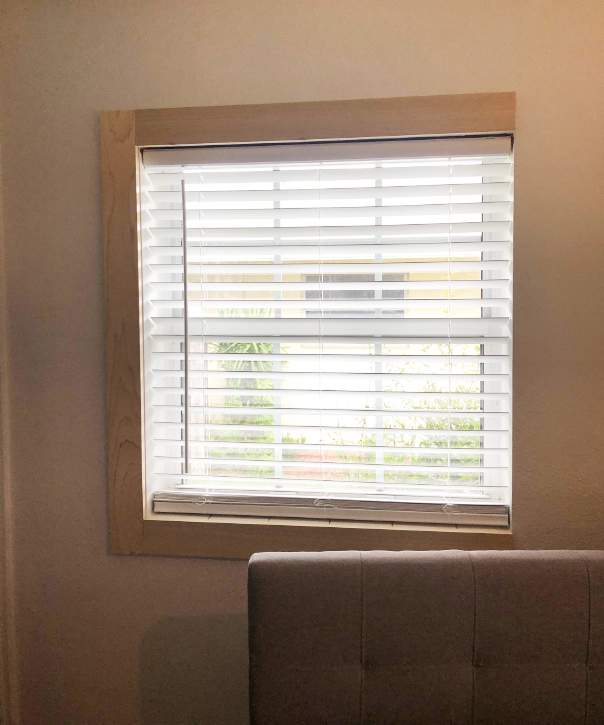
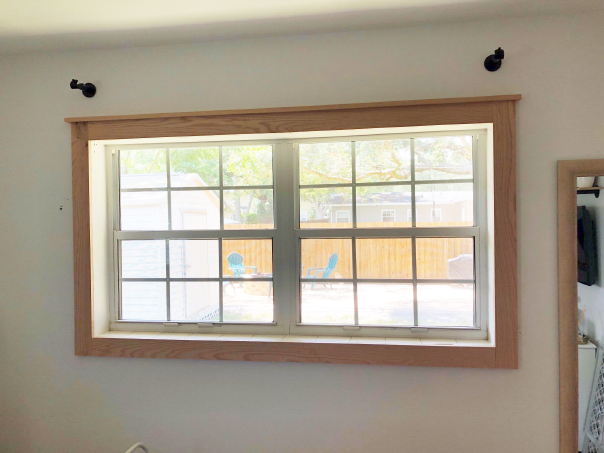
LOOKING GOOD
We had two windows, one larger one which you can see below and another smaller that we did the same thing to. As you can see, we have old tile on the ledge of our window, we covered this with another slightly thinner piece of wood we found that was the same width of it. We didn’t nail this, but used an adhesive glue that stuck to tile.
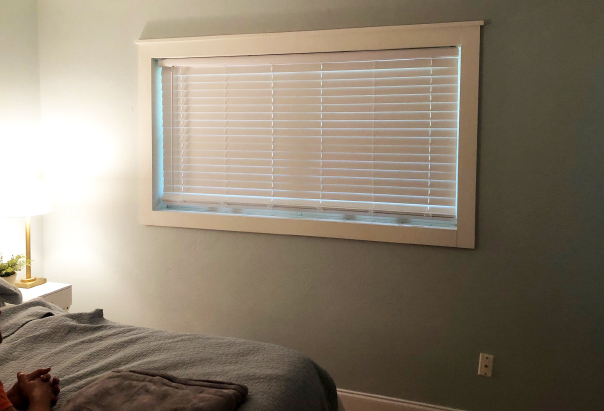
SMALL FEE, BIG CHANGE!
All done, it honestly already looked amazing just bare! But I wanted to paint the walls so my next step was to paint the trim white and the walls a baby blue!

NEW WINDOW TRIM!
I’m so obsessed with how it looks that Lucas and I are going to start doing these trims to all the rooms in the house. It just adds dimension and makes so much character come out of a bedroom. It looks like a new room!


")

