
")
")
")
DIY WALL ART
So the reality of this post came one evening while relaxing on my couch browsing through wall art and realizing how hard it was to find A. something I liked and B. A piece that wasn’t SO expensive. So I thought to myself, heck, why don’t I just attempt to paint my own art and frame it! So I did! And I’m so happy with the outcome because I have an art piece that I love and it holds a special meaning to me because I created it! And you can too!

What you will need:
Canvas
Acrylic Paint
Brushes
Art Easel
C-Clamps
Gorilla Glue
Wooden Planks
Cutting Saw
FIGURE OUT WHAT TO PAINT
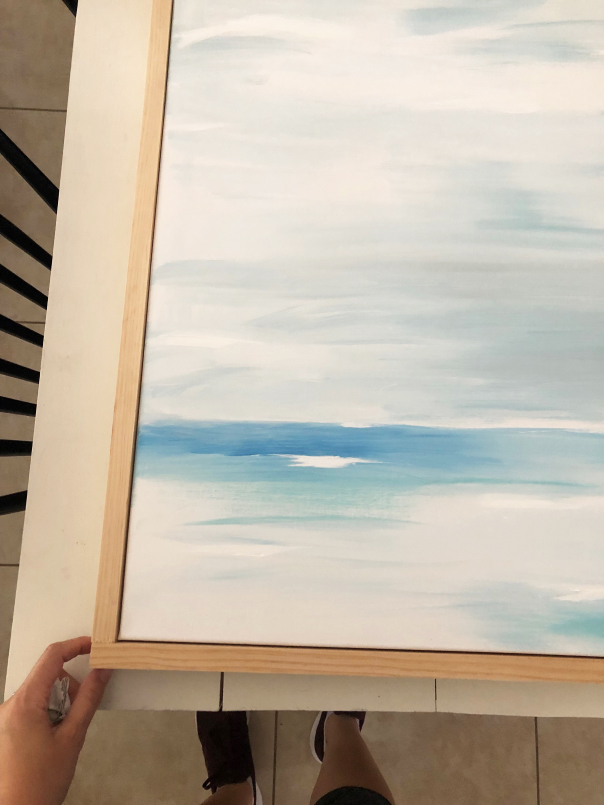
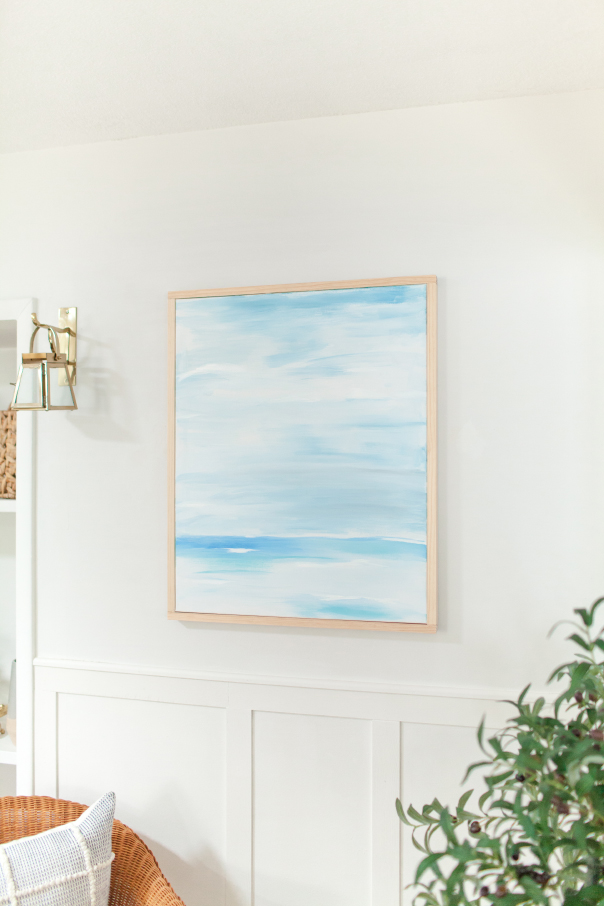
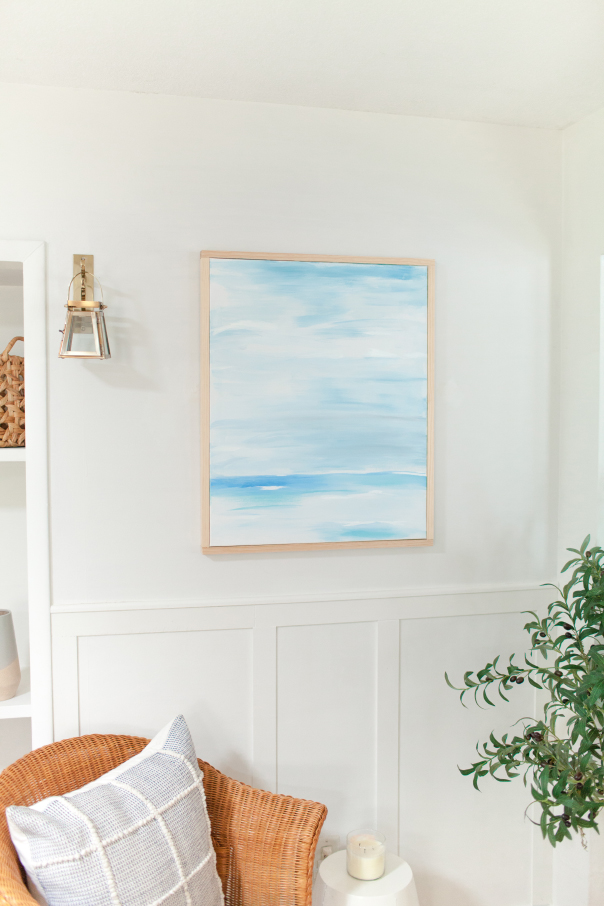
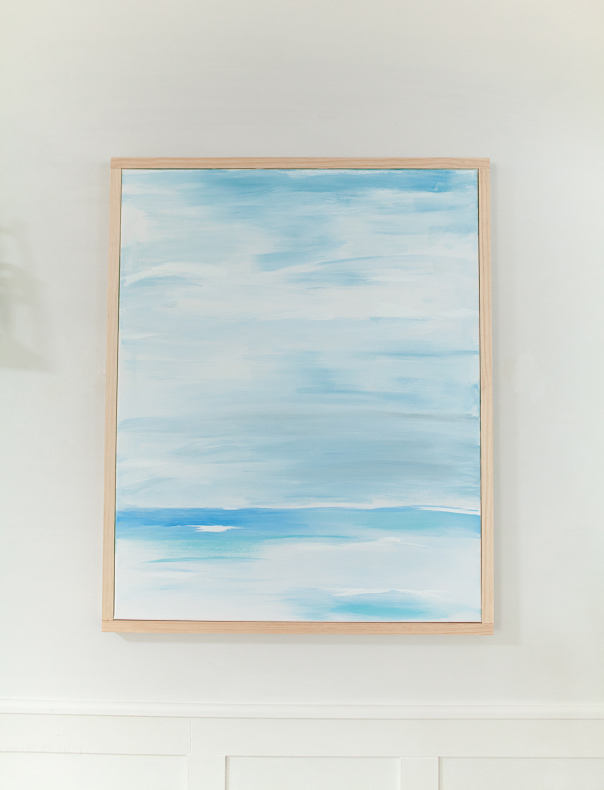
Before you begin you have to decide whatever that is you want to paint, what room you would like to place it in and what colors they will consists of. I chose to stay within 4-5 colors max to keep things simple, less is more to me so since my living area is turning softer and into a coastal feel, I figured a nautical type painting would fit best!
PREPPING YOUR CANVAS
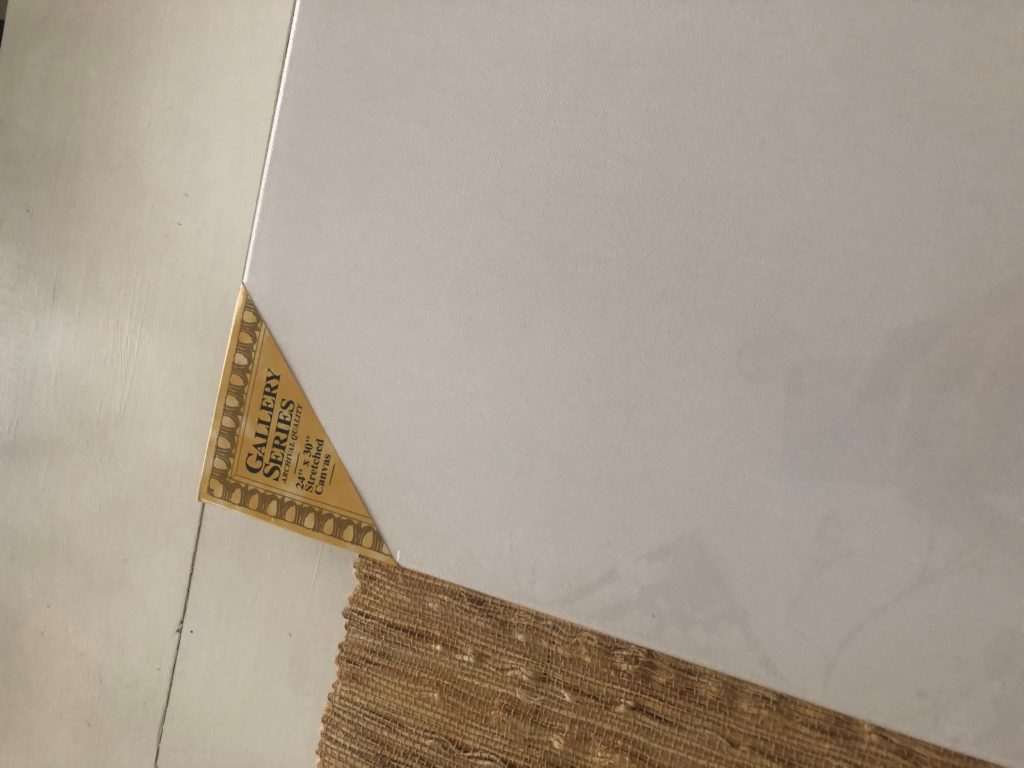
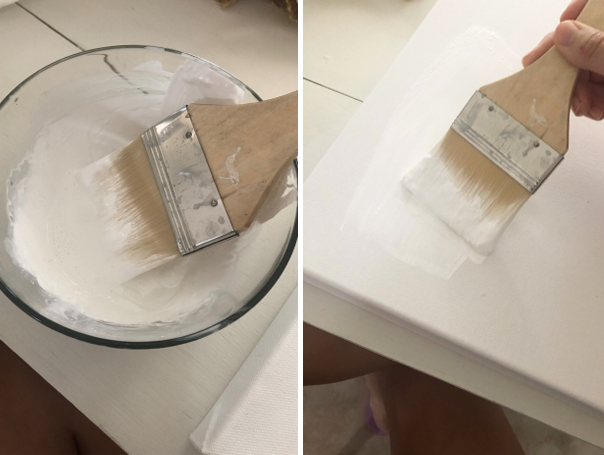
Choose whatever size of canvas you like, this will depend on your personal styling and where you would like to place it of course. Once you have your canvas unwrapped, grab a small bowl and mix with a few drops of water with white acrylic paint. Paint your entire canvas with one coat of white paint to prep your board. Allow it o dry completely.
You’re ready to get artsy! This is the fun part! Start to paint your wall art, get creative and let your imagination run wild. Don’t be too hard on yourself with any imperfections, art is art! Allow to dry completely when you’re finished!
TIME TO FRAME IT
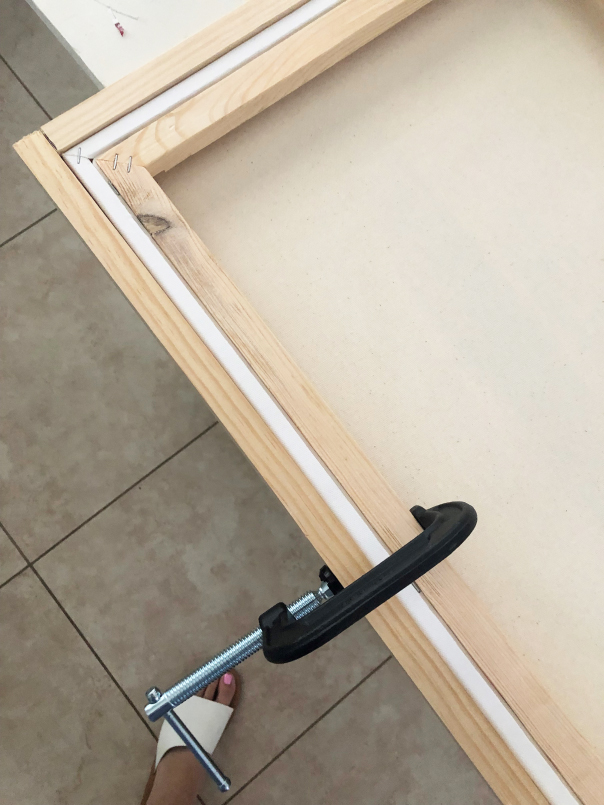
Depending on the thickness of your canvas you will want to find a wooden plank to match the width size of your canvas board corners, if it’s off by a small amount don’t freak as long as it’s not sticking out too much. I chose a select pine for my canvas and used a saw to slice each board down to the dimensions I need for my arwork.
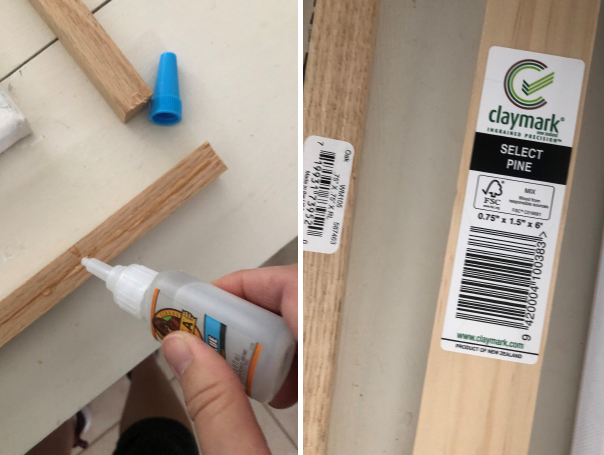
Once your pieces are cut down, you can either stick with the natural wood you purchased or stain it darker or lighter depending on your style. I kept mine natural because I honestly liked how it looked!
You will now want to use your Gorilla Glue to add each plank , I started from the bottom first then the sides.
SECURE YOUR FRAME
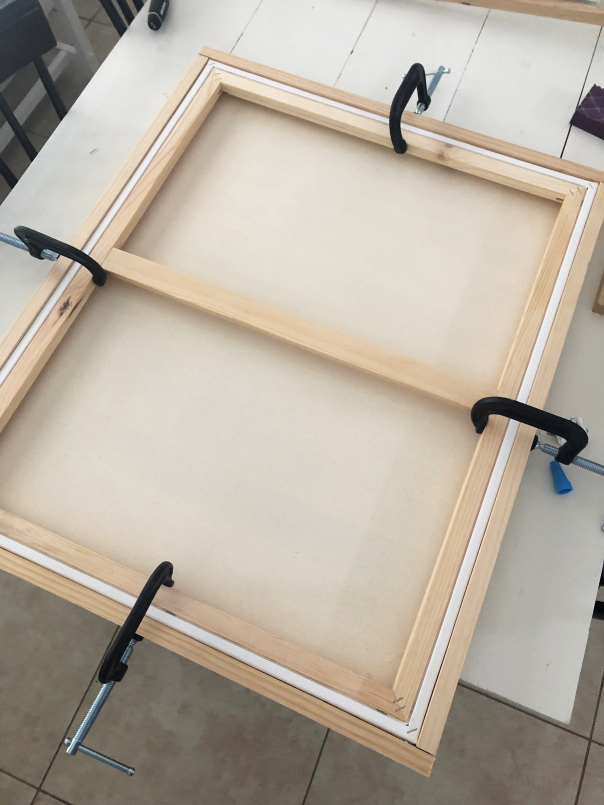
Each wooden plank should be placed and glued then using your C-clamps, place them one by one in the center of each. Continue until you’re finished clamping each corner and let it stay like this for at least 2 hours to make sure its glued and secured.
YOU DID IT
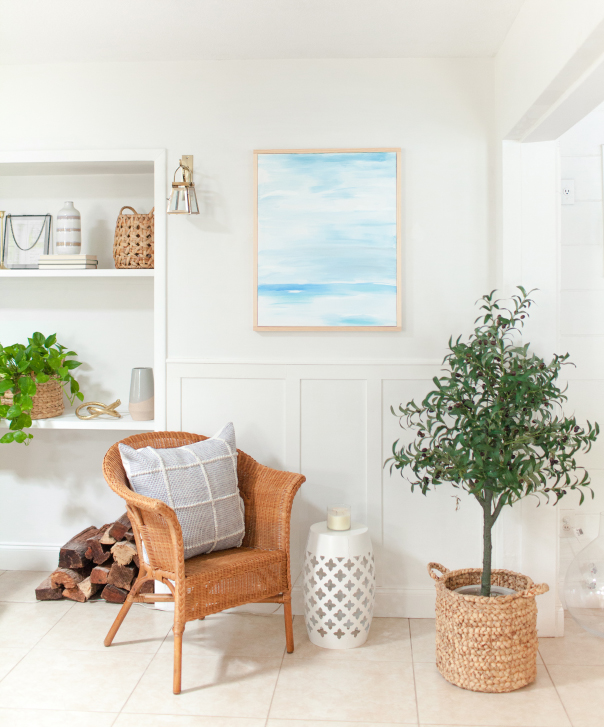
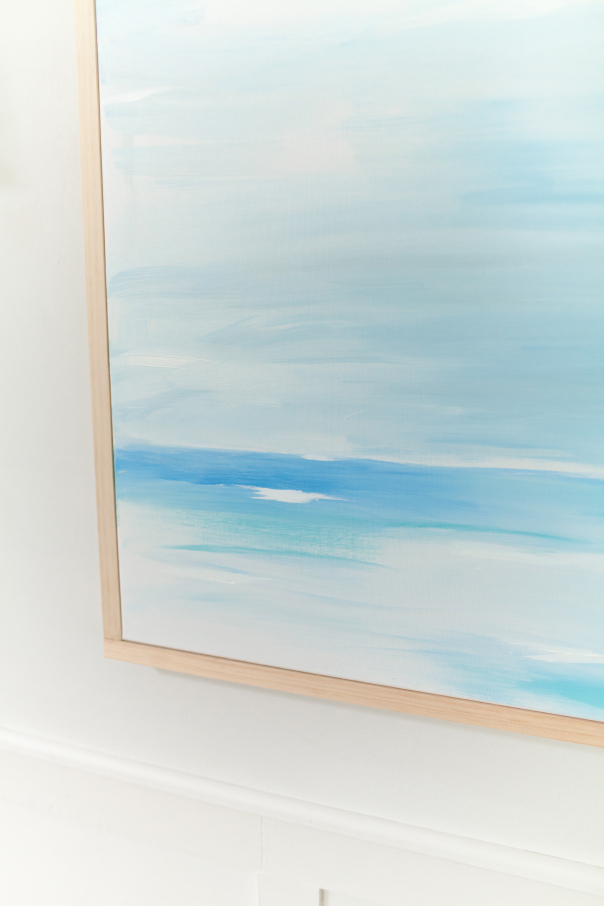
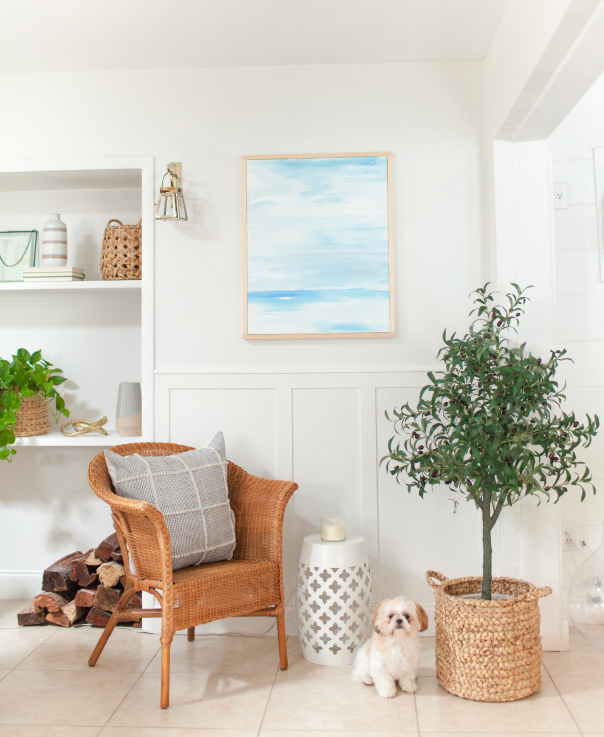
The wall art of your dreams is complete! Now find a spot and bask in the prettiness that you created! Ah, how lovely! Wasn’t that easy? Let me know what you painted, I can’t wait to see it! If you’re interested in a custom art painting, please let me know what you’re looking for and I’d love to paint a piece just for you!


")

