
Oh You Fancy, huh?
Some of the links in this post may be affiliate links.
This means if you click through and make a purchase, I may earn a small commission at no extra cost to you. See our disclosure for more info.
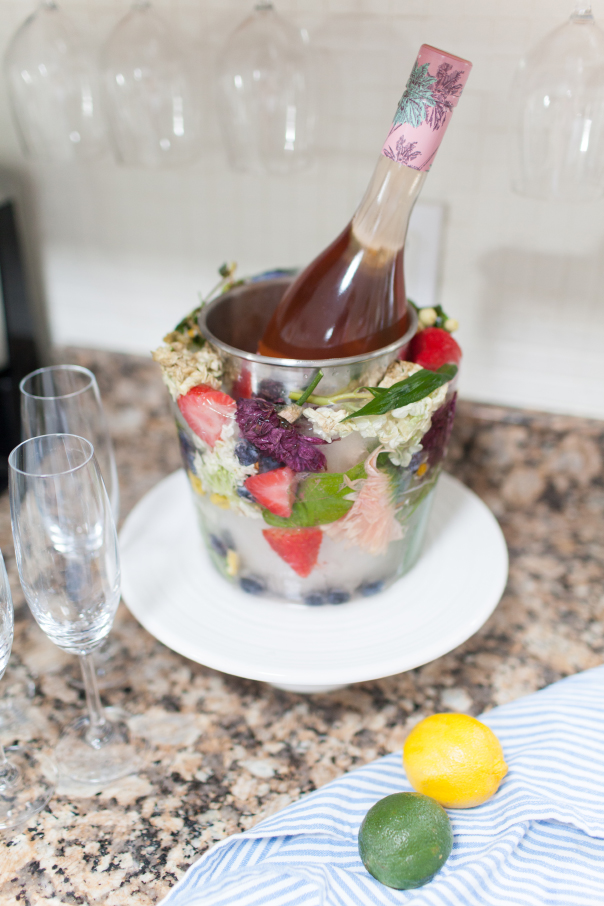
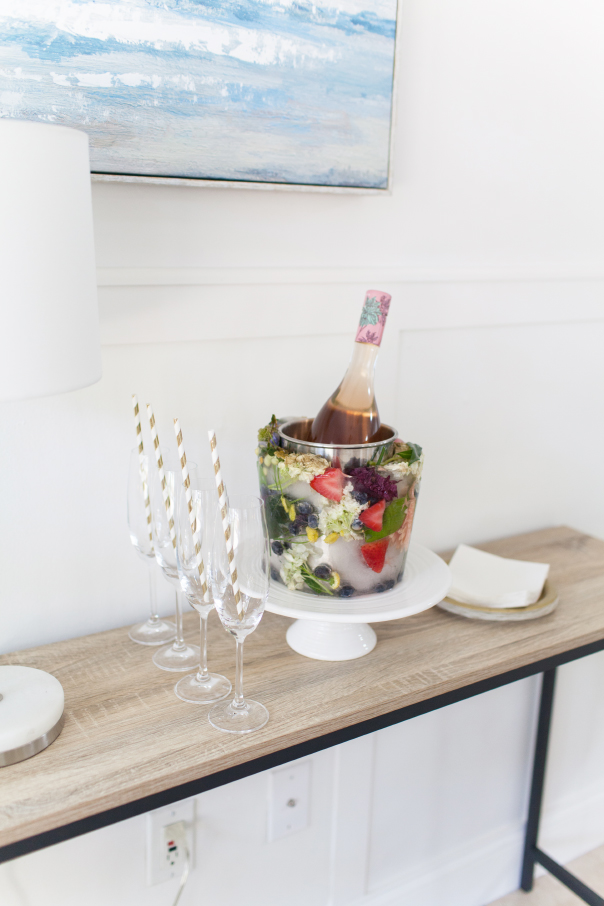
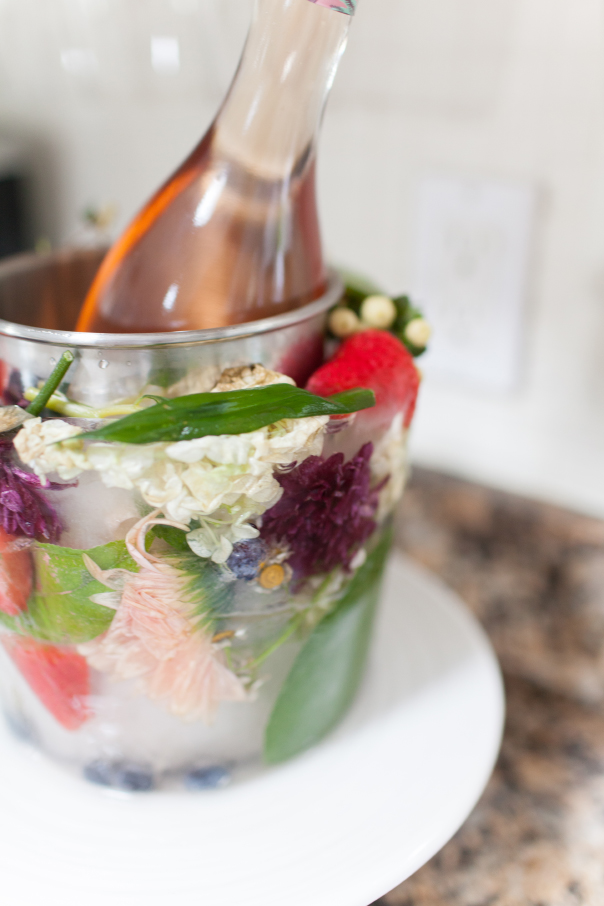
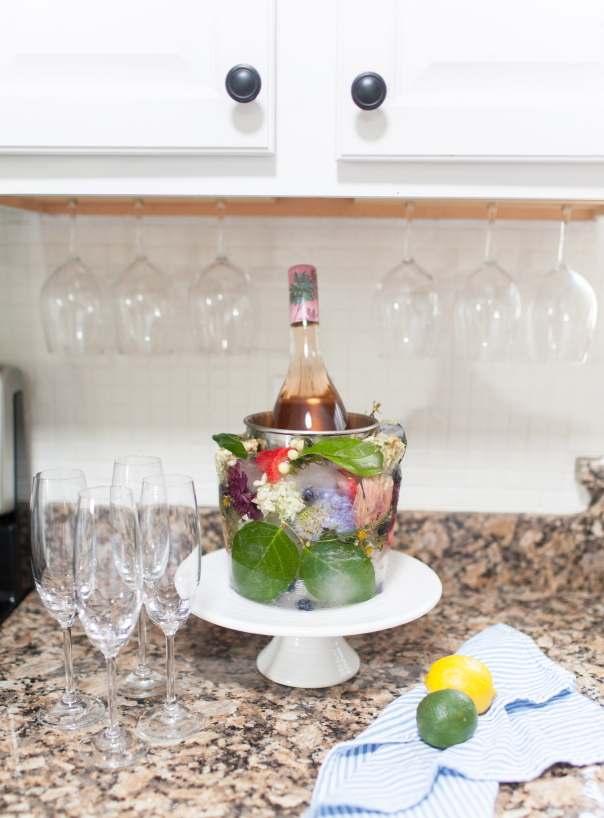
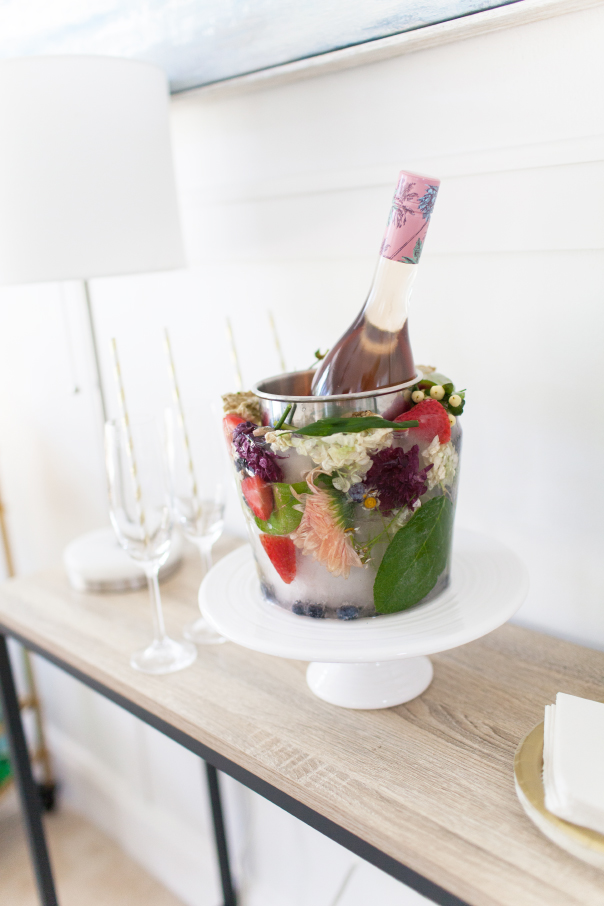
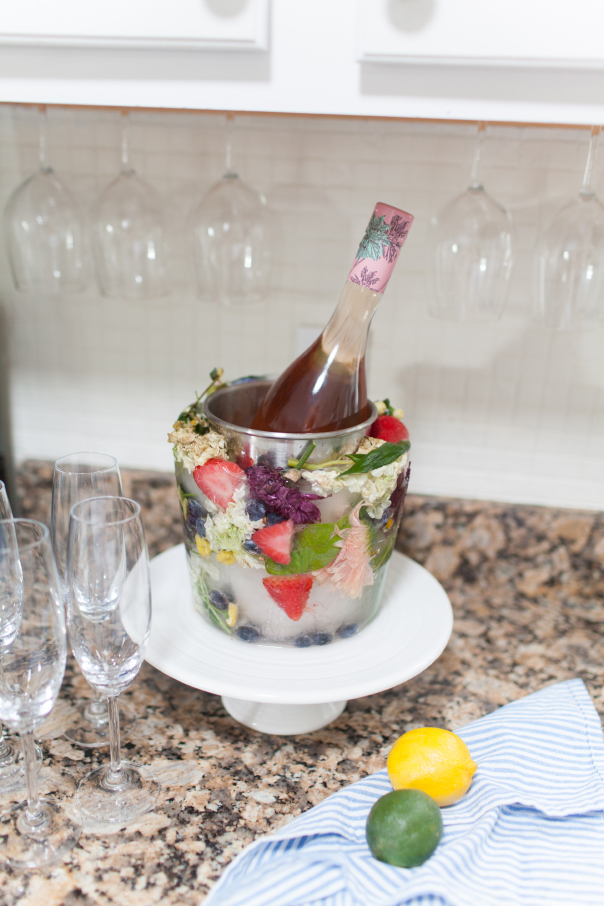
When it comes to being the “extra” hostess you can count on me for claiming that title! So that brings me to share with you a prettier way to dress up your bottle of bubbly for your next celebration or just because! The floral ice bucket is an adorable addition for any bridal shower, engagement, baby shower, birthday, or whatever you like!

Let’s Make It!
Creating a floral ice mold can be a beautiful way to add a decorative touch to your drinks. Here’s a step-by-step guide to making a floral ice mold:
Materials Needed:
- Edible flowers: Make sure they are safe for consumption (e.g., pansies, violets, nasturtiums, or rose petals).
- Water: Distilled or boiled and cooled water works best for clear ice.
- Ice mold: Silicone molds work great, but any ice tray will do.
- Tweezers (optional): For placing flowers precisely.
The Steps:
- Clean the Flowers:
- Gently rinse the edible flowers to remove any dirt or insects. Pat them dry with a paper towel.
- Prepare the Water:
- For clearer ice, use distilled water or boil the water and let it cool before using. This helps reduce air bubbles and impurities.
- Layering the Flowers and Water:
- Fill the mold about 1/4 of the way with water.
- Place the flowers face down in the water. Use tweezers for precise placement if needed.
- Freeze this layer until it’s solid (this prevents the flowers from floating to the top).
- Add More Water:
- Once the first layer is frozen, add more water to fill the mold halfway.
- If you want to add more flowers, place them gently and make sure they are submerged in the water.
- Freeze this layer until solid.
- Final Layer:
- Fill the mold to the top with water.
- Add any final flowers, ensuring they are fully submerged.
- Freeze until completely solid.
- Removing the Ice:
- Once fully frozen, remove the ice mold from the freezer.
- Let it sit at room temperature for a few minutes or run the bottom of the mold under lukewarm water to loosen the ice.
- Serve:
- Carefully pop out the floral ice cubes or mold.
- Add to your favorite drinks and enjoy the beautiful presentation!
Tips:
- Flower Placement: For a more natural look, try to vary the placement and type of flowers in each layer.
- Water Additions: If you want to enhance the flavor, you can add a few drops of lemon juice or other extracts to the water.
- Storage: If you need to store the floral ice molds, keep them in an airtight container in the freezer to prevent freezer burn.
By following these steps, you can create stunning floral ice molds that will impress your guests and add a touch of elegance to any beverage. Enjoy! Check out more of my home posts!

")
